Note
Go to the end to download the full example code. or to run this example in your browser via Binder
Physically Based Rendering#
VTK 9 introduced Physically Based Rendering (PBR) and we have exposed that functionality in PyVista. Read the blog about PBR for more details.
PBR is only supported for pyvista.PolyData and can be
triggered via the pbr keyword argument of add_mesh. Also use
the metallic and roughness arguments for further control.
Let’s show off this functionality by rendering a high quality mesh of a statue as though it were metallic.
from itertools import product

import pyvista as pv
from pyvista import examples

# Load the statue mesh
mesh = examples.download_nefertiti()
mesh.rotate_x(-90.0, inplace=True)  # rotate to orient with the skybox

# Download skybox
cubemap = examples.download_sky_box_cube_map()
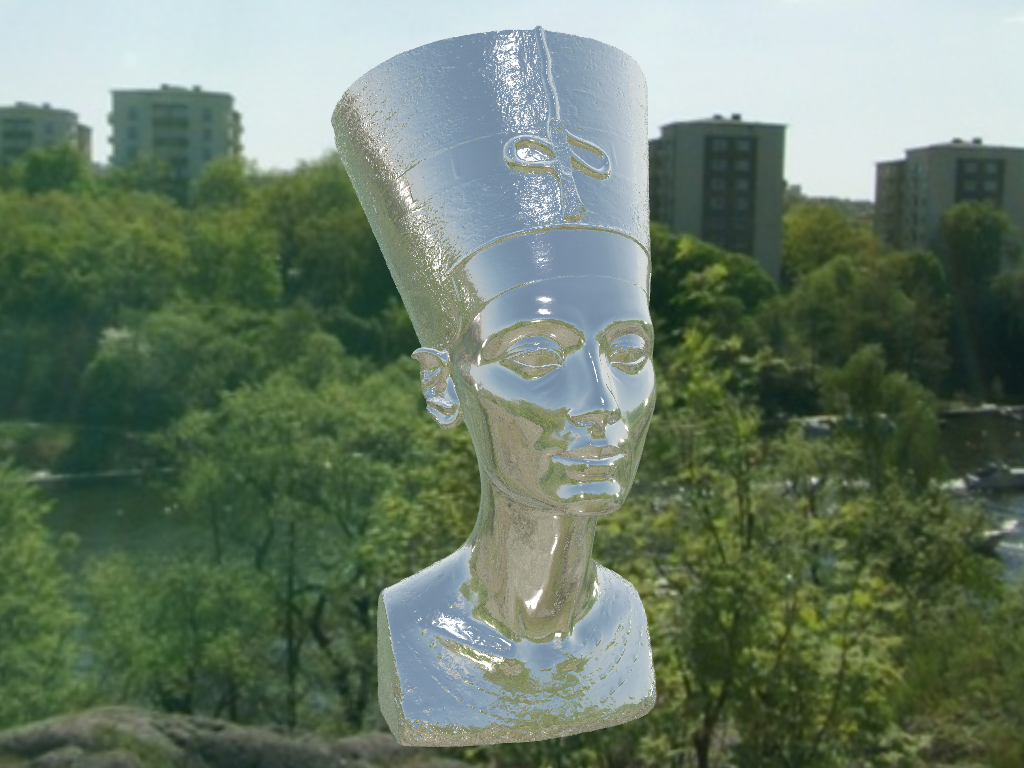
Let’s render the mesh with a base color of “linen” to give it a metal looking finish.
p = pv.Plotter()
p.add_actor(cubemap.to_skybox())
p.set_environment_texture(cubemap)  # For reflecting the environment off the mesh
p.add_mesh(mesh, color="linen", pbr=True, metallic=0.8, roughness=0.1, diffuse=1)

# Define a nice camera perspective
cpos = [(-313.40, 66.09, 1000.61), (0.0, 0.0, 0.0), (0.018, 0.99, -0.06)]

p.show(cpos=cpos)

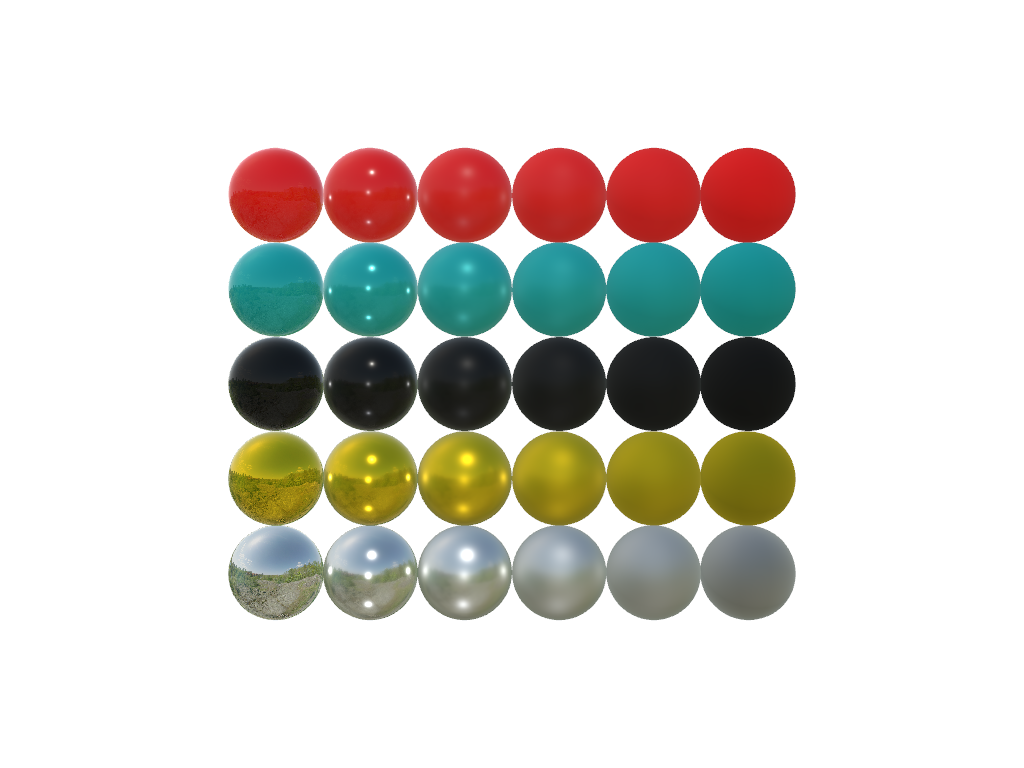
Show the variation of the metallic and roughness parameters.
Plot with metallic increasing from left to right and roughness increasing from bottom to top.
colors = ["red", "teal", "black", "orange", "silver"]

p = pv.Plotter()
p.set_environment_texture(cubemap)

for i, j in product(range(5), range(6)):
    sphere = pv.Sphere(radius=0.5, center=(0.0, 4 - i, j))
    p.add_mesh(sphere, color=colors[i], pbr=True, metallic=i / 4, roughness=j / 5)

p.view_vector((-1, 0, 0), (0, 1, 0))
p.show()

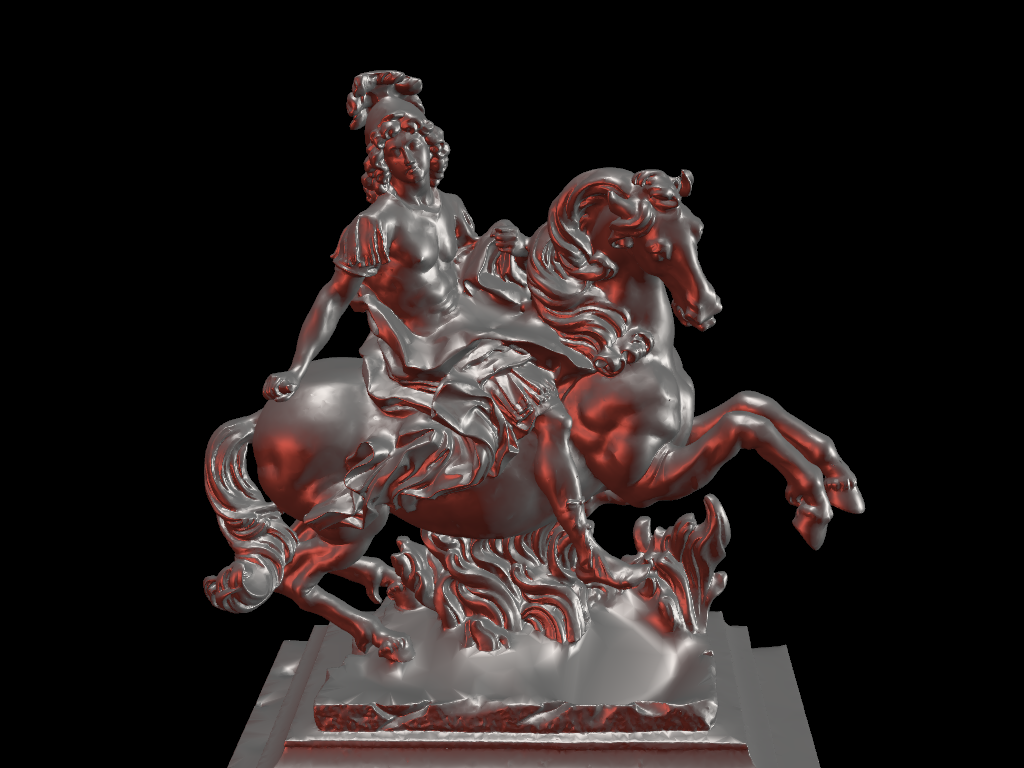
Combine custom lighting and physically based rendering.
# download louis model
mesh = examples.download_louis_louvre()
mesh.rotate_z(140, inplace=True)


plotter = pv.Plotter(lighting=None)
plotter.set_background("black")
plotter.add_mesh(mesh, color="linen", pbr=True, metallic=0.5, roughness=0.5, diffuse=1)


# set up lighting
light = pv.Light((-2, 2, 0), (0, 0, 0), "white")
plotter.add_light(light)

light = pv.Light((2, 0, 0), (0, 0, 0), (0.7, 0.0862, 0.0549))
plotter.add_light(light)

light = pv.Light((0, 0, 10), (0, 0, 0), "white")
plotter.add_light(light)


# plot with a good camera position
plotter.camera_position = [(9.51, 13.92, 15.81), (-2.836, -0.93, 10.2), (-0.22, -0.18, 0.959)]
cpos = plotter.show()

Total running time of the script: (12 minutes 31.372 seconds)
